
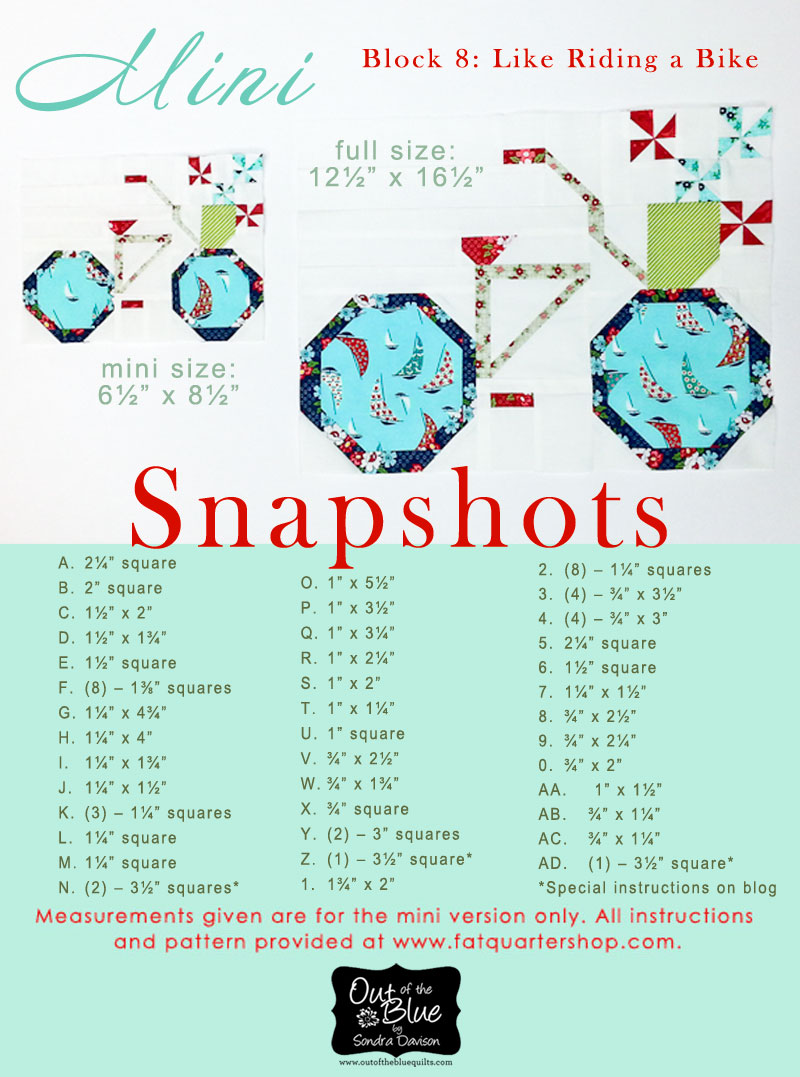
Snapshots Quilt Along Mini Quilt Block Eight: Like Riding a Bike Pattern

Done. I am completely in love with this bicycle block. I know I say this repeatedly, but I’ll say it again. Thank you, Fat Quarter Shop, for providing us with such a wonderful quilt-along. It’s been a joy doing your full-size version blocks, and I love having the opportunity to share the miniature blocks with everyone. I can say, though, this month’s mini was waaaaaaaaaaaaay miniature. So much so, I made some adjustments to how I cut and made half square triangles, so for those of you following along, please be sure to read through this entire post, see how I did my changes and save yourself some extra work (or hair pulling) later and do the same.

Did I say tiny? That pinwheel is .75″ square. Yep….3/4’s of an inch. THREE-QUARTERS, I say – insane!! You are not going to enjoy making it in the traditional manner, so follow along.
I usually make half-square triangles eight at a time. I was going to do a full tutorial here, but it seemed silly when the Craftsy website (which I adore and take tons of online classes there) has a lovely tutorial already on it’s blog and even better, there is a downloadable instruction sheet offered, so you can print it and take to your sewing table. No point in me repeating the whole thing here. Plus, Karen Walker, the author, provides the math equations in simple terms so you can use this for other projects, as well. So jump over there for a moment, print her download and read her tutorial and then come back. I’ll post a few more pics in progress here, while I wait for you….

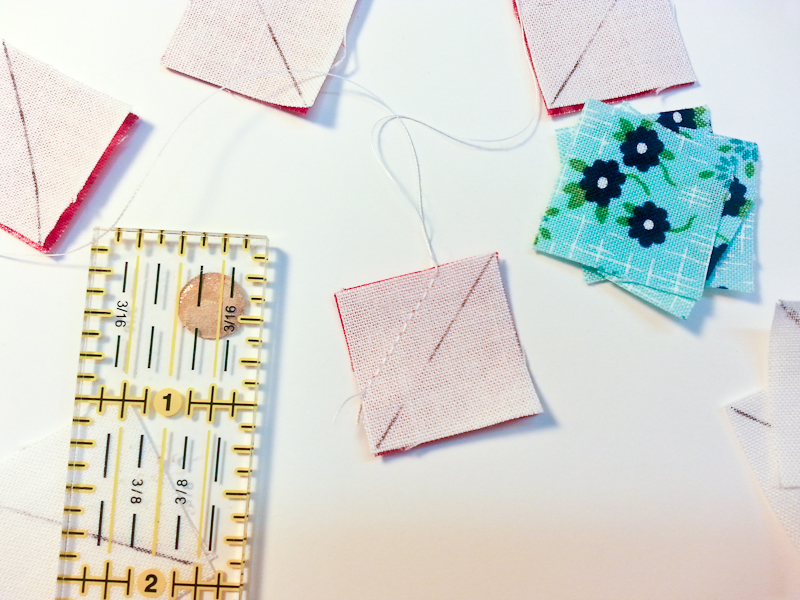
Are you back? That was quick. Above are examples of the traditional method of piecing the HSTs. Since the miniature blocks start at one inch for the pinwheel blades, then those 1″ pieces get sewn and cut in half, you are down to a block that is….oh man. Makes me crazy thinking about it. We’re not going to do that. Even if you make it through that, you have to sew more quarter inch seams to finish with a pinwheel block that is only 1¼” square! Unfinished. Not happening on this side of the screen and it didn’t happen on my sewing machine, either.
I used the Speedy 8 HST method (make 8-at-a-time) and made my mini and full size blocks at the same time using this equation. So, if you haven’t made your full size block yet, double the fabric pieces below and continue with the instructions.
Revisions to Fabric Pieces AD, Z and N
- Fabric AD cut (1) 3½” squares
- Fabric Z cut (1) 3½” squares
- Fabric N cut (2) 3½” squares
These revisions are reflected on the Mini card at the bottom of the post. Trace your sewing and cutting lines on the back of your Fabric N squares (following instructions from tutorial). Place a Fabric N square right sides together on each Fabric AD and Fabric Z square. Sew and cut per tutorial. Press per your FQS block instructions. If you are using this equation for the full size block, just square up your pinwheel (shown below) to a 2″ block. For the mini version, we have another step.
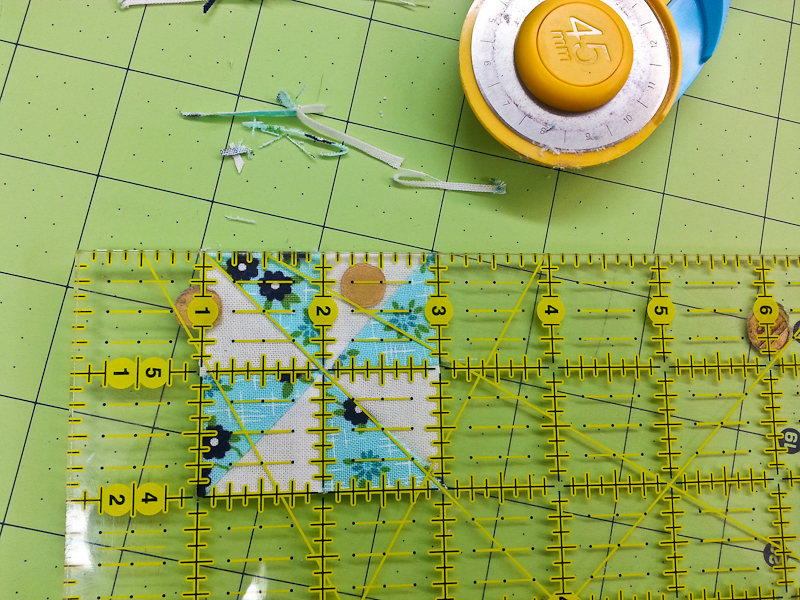
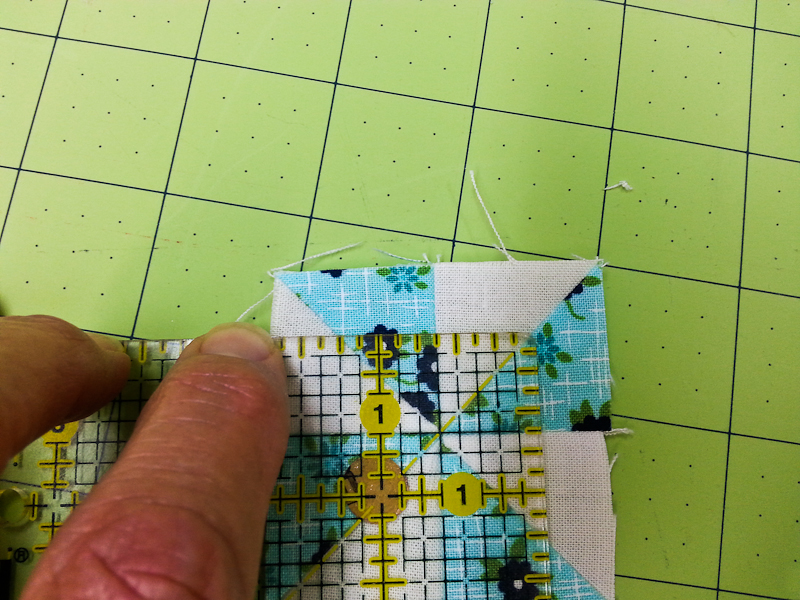
You will be trimming the block down to 1¼” for the mini version. You can use a standard ruler and align the 45-degree angle along a pinwheel blade, being sure that the center is at the ⅝” mark of the ruler. Trim the excess on the side and top of the ruler. Turn your block and repeat this on the remaining two sides.
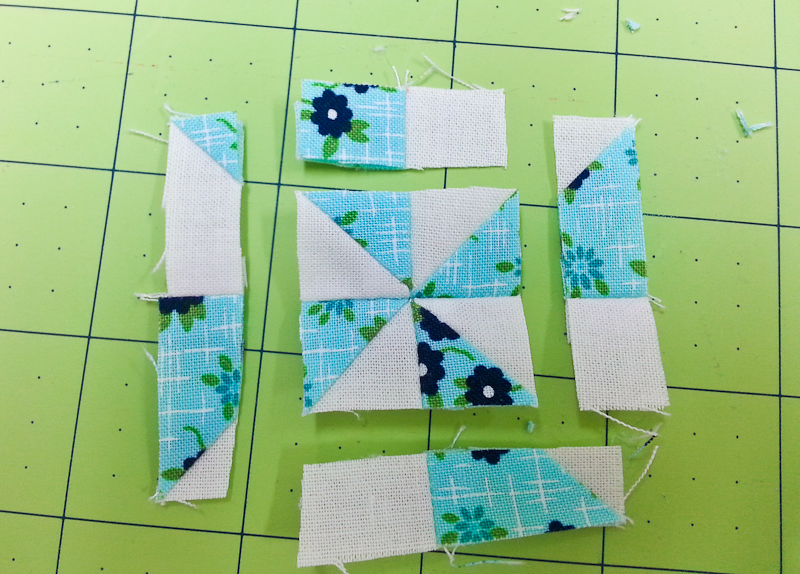
Ta Dah!!! Make two red/white pinwheel blocks and two blue/white pinwheel blocks.
You can also use any type of “square it up” ruler, as I did below. Just remember to locate the ⅝” mark at the center of the block when squaring it.

Oh my….I just tried to wipe the smudge off my computer screen and realized that’s on my ruler! Tsk, tsk! Need to do some tool cleaning.

Everything else went together smoothly. I did a lot of trimming my seam allowances to one-eighth inch after they were sewn. I notice that Lori Holt of Bee In My Bonnet presses a lot of her seams open for small projects. She talks about it on her blog in these posts. Since I’m already trimming seam allowances on these blocks, I’ll continue as is, but the next “mini” quilt I attempt, I want to try her “press open” suggestion.

Here is your mini measurement card for Block 8! Best of luck and let me know if you have any questions!
Thanks for sharing spares me the trouble to finger the math out myself;-) My I think there’s a mistake with ‘Q’ it only needs to be 3 1/4″ long.
Hildy! Oh my gosh! You are so correct. Thanks for spotting that typo. I’m making the change right now!
Hi Sondra,
I just finished my regular bicycle. Oh those half-square triangles were tough at an inch. I will make the mini when I am done with the whole quilt. I did download the free pattern at Craftsy. This one will be challenging. Thanks as always getting these for us quilters. On to the cat, was hoping they might release it early today…one can dream. Have a lovely day! Chris
Hi Chris! I love getting comments and updates from everyone. Thanks for sharing with me! Those teensy, tiny blocks are a booger (to put it quite inelegantly). I’m loving these blocks, though. Large or small, they’ve been fun and a great learning tool. I just got home and saw the cat block was released today, so it looks like an evening in the sewing room is now in the works!
Hi Sondra! Thank you so much for making the mini measurements available for us!
I always press seams open when I make this kind of block. I have Lori Holt’s books and I think sometimes the direction of the seam pressing doesn’t make sense – you end up with 4 layers of fabric on one side, creating a bulk, while the other side had none. So I started pressing open every time and haven’t regretted since. It’s also easier because I just automatically press open, I don’t have to consult the book to see which side is right.